Character story for MAY ISOLATION
-
@gavpartridge yes
God willing, ill be making tutorials in the near future. -
Hi @franksandovalart, great storytelling! I’m ready to read the full comic! You’re illustrations are incredible!
-
@Jeremy-Ross
Thank you Jeremy! -
@franksandovalart this is beautiful!!
-
@Pamela-Fraley
Thank you Pamela -
@gavpartridge
since I didn't record the process, I put together this Gif with some screenshots of the Character, to try and explain how I rendered this illustration.
-
Paint darker local colors as if the lights were off on the scene
' Paint as if it was an overcast day, using form and Ambient Occlusion -
AO/ Ambient Occlusion / contact shadow
' Areas where there's less light-hitting, these areas would be darker -
Shadow on character
' Adjustment layer, Hue/Saturation check on colorize
' Used a Multiply layer with a cool saturated color
' Used a mask alpha to paint on -
Add light source / directional light
' Here is where you add the true local color on the lighted side
' I like to use an adjustment layer for this
' Hue/Saturation check on colorize, on an Overlay layer, here you add the color of the main light source, example the sun, I would use a bright orange-yellow color
' Used a mask alpha to paint on -
Add sky fill color
' This is the light on the shadow side, usually the skylight, or any other light source that is not the main direct light. in this case, I use a rich blue color, you could also use magenta depending on the art style or time of day.
' Used a mask alpha to paint on -
Bounce light
' This is the warmer more saturated color on the shadow side
' I like to use the adjustment layers to have more control, selecting a warm color, orange/reds, in Hue/Saturation check on colorize, increase the saturation and then darken until u get the desired color, the cool thing about using this method is that u can adjust and see the changes live on your illustration.
' Used a mask alpha to paint on -
Lights on the space backpack
' Painted the saturated colors of the lights and then added another layer under with a blur brush using Overlay -
Levels Adjustment to increase the brightness
-
Added finished details, Paint over
-
Finished the illustration by painting atmosphere
' I used a reddish-brown color using the airbrush
' Overlay and Lighten layers to give it a bit of an Instagram effect.
Hope this was helpful
God bless you!
Thank you!
-
-
This post is deleted! -
@gavpartridge no problem, in Photoshop there are many ways of doing one thing

-
Hi everyone!
Exploration ideas that I played around with on the illustration, I decided to go with (E).
History of the main idea for the illustration:
I wanted the illustration to be a positive IsolationDid some research about all the animals that were used on early space projects, sadly most of the animals died, until Ham the chimp,
''the first hominid launched into space. On January 31, 1961, Ham flew on the Mercury-Redstone 2 mission, part of the U.S. space program's Project Mercury''
according to WikipediaWanted to make a character that people could associate with and also be believable
Like Ham the space chimp was the first Chimp that flew to outer space and came back before humans, Zed was the first chimp on Mars before humans.
I picked Mars because the red planet has been one of human beans fantasy for many years, and also because it takes seven months to get there, imaging been that far away from civilization and getting any type of help.
anyways, Just wanted to share some of my workflow with all of you, this illustration was a lot of work, but very fun to make.
Be safe out there
and my God bless you!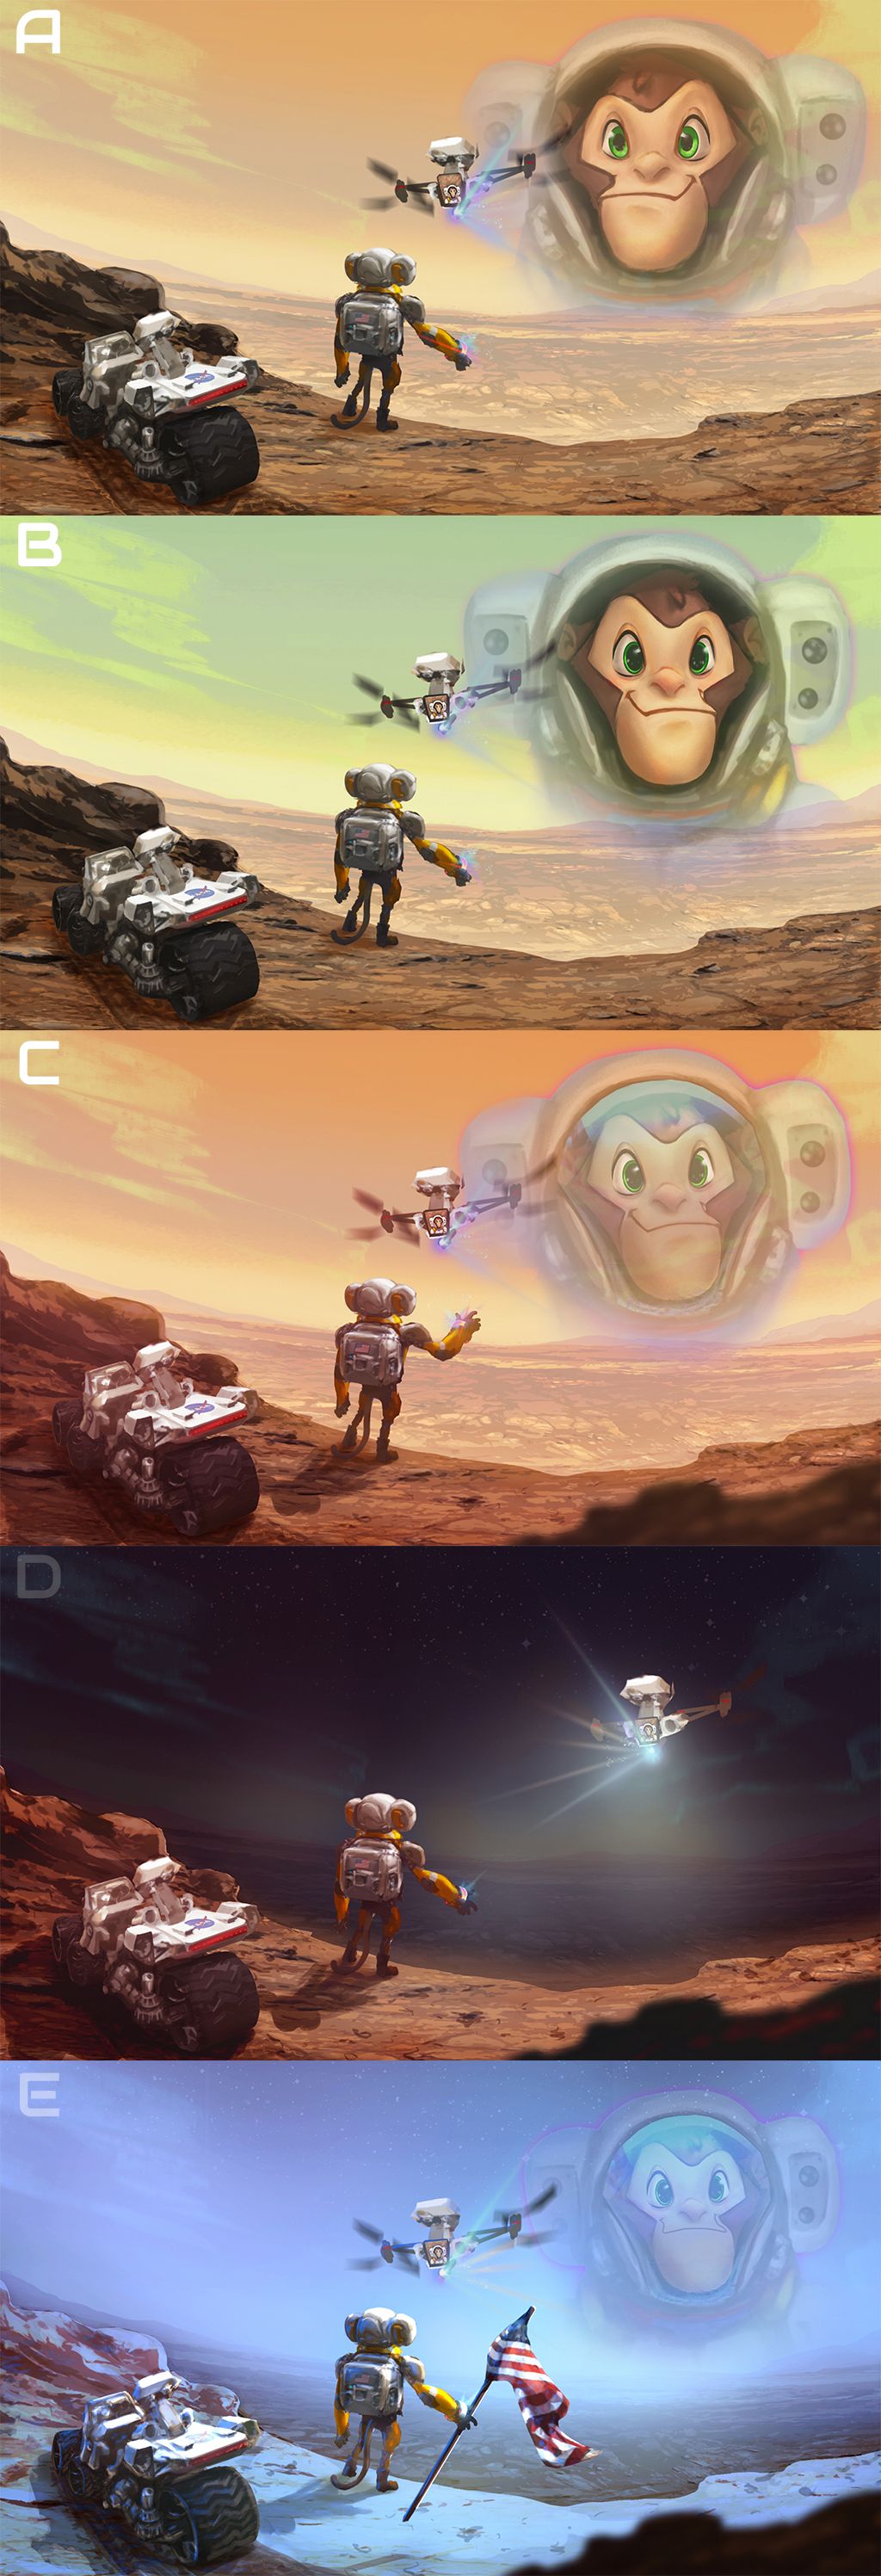
-
@gavpartridge
If you are still interested i now have video tutorials explaining my process for Procreate, the methods use also apply for Photoshop.Thank you!
You can find it here:
https://franksandovalart.com/store