Advanced perspective--I spent HOW long on this?
-
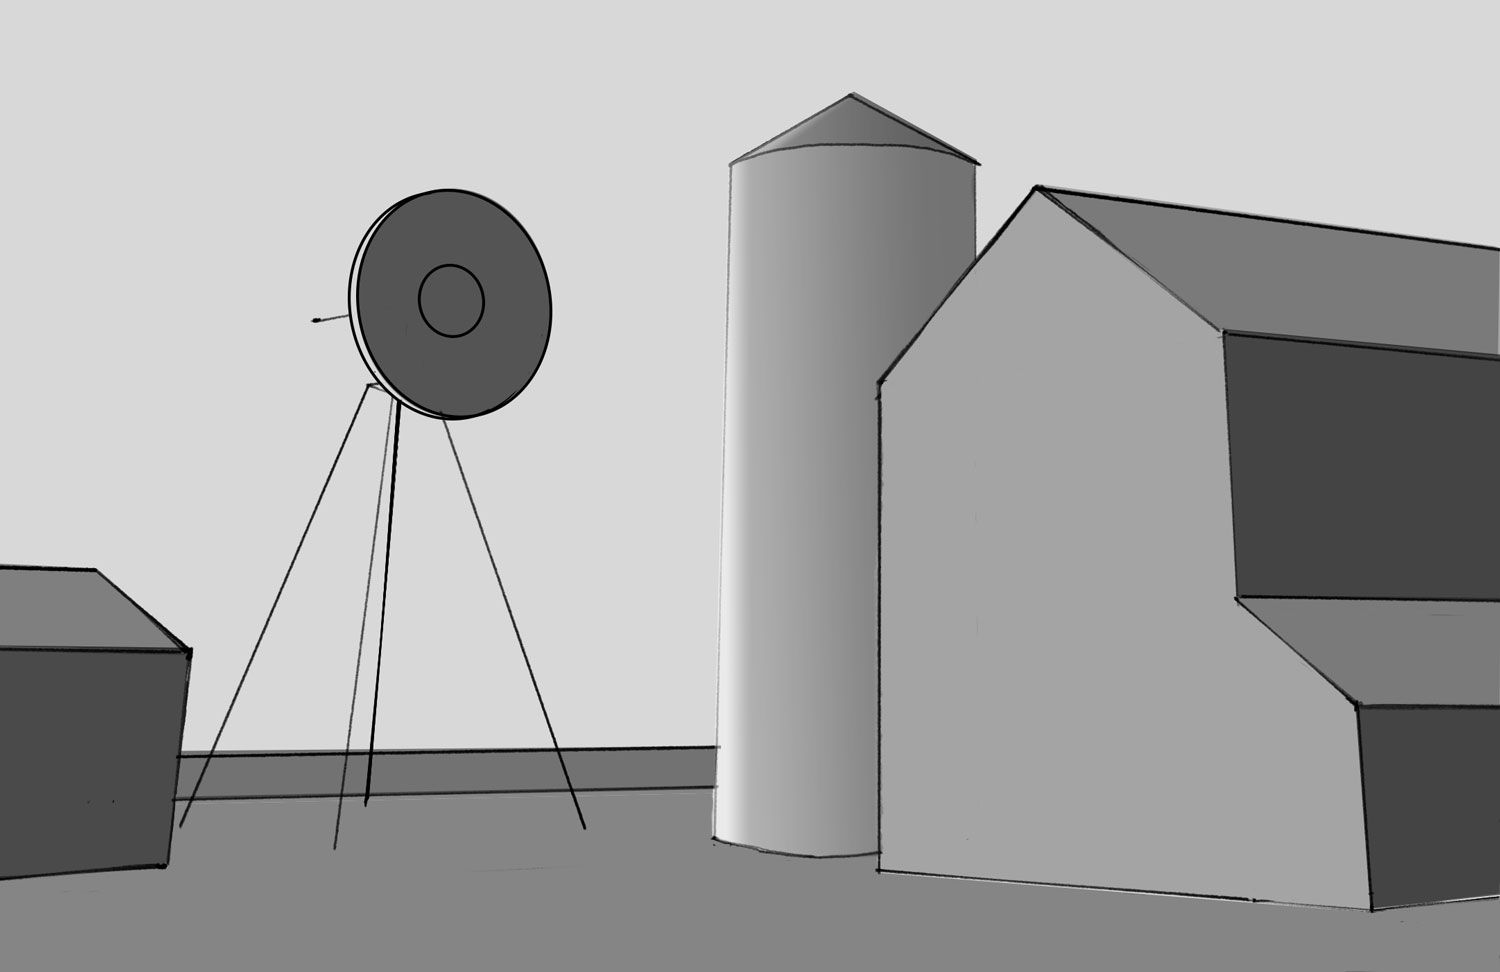
A great illustration this is not, but it is my (second) attempt at doing the final project in the Advanced perspective class. It took about 8 hours, and that's not counting the first attempt, whose file got corrupted somehow just as I was about to start the actual drawing. It was almost enough to turn me into a Cubist!
Despite my frustration with my attempts, the content of the course was great! I especially appreciated the tips on drawing cylinders and on how to extend out the vanishing points so as not to wind up with a warped perspective. Also, the concept of cone of vision was an eye-opener! I think the info will really come in handy.
Now that I have done this assignment, I do have some questions if you have the time to answer them, @davidhohn or anyone else who knows:
-
Obviously my composition would have benefitted from some thumbnails in order to choose a more interesting camera angle and field of vision. Instead, I chose my POV mostly based on mechanics. In fact, I had originally intended to get in the far end of the house, but it was too wonky! How to you accurately predict where your cone of vision will be as you start to set up your grid?
-
Any tips on dealing with unwieldy files on Photoshop? I have a 16" Cintiq and in order to extend the vanishing points out far enough not to warp the perspective, the drawing becomes so tiny that I can no longer see to accurately place the perspective lines. (You can't drag and zoom at the same time--I tried!) I also get lost in all the perspective line layers and in fact, my file may have locked up yesterday because there were over 100 of them! (Today I merged mercilessly.)
-
Any tips on drawing an accurate grid on a scene with a low horizon line, or even a worm's eye? I had to raise the horizon line at least a little to have any hope at all of creating the necessary grid along the ground. And even so, I did quite a bit of fudging as I approached the horizon line and the 13th square, because there was so little space between the lines. (And in spite of my efforts, I just noticed that the silo ended up lined up with the barn instead of recessed!) Yesterday's more worm's eye version had the plan in the sky and I was pulling the lines down along the third point. I notice that perspective drawing is much easier to do when the camera angle is very high up.
- What do you do if, for example, you draw a room and some objects of furniture, say chairs, are not at right angles to the rest of the objects in the room? I suppose you have to do a separate grid, but how does that work?
At any rate, I'm guessing the idea behind the course is not to get us to spend hours and hours drawing a grid each time, but to get us acquainted with the fundamentals of perspective. And that, it does very well! And I'm hoping, at least, that it goes faster and feels less mechanical with practice? It seems like an essential skill for any relatively realistic illustrator, but I confess I need a little encouragement that it gets easier and more, well, artistic!
Thanks, David!

-
-
Well done! A big part of this is just to have a go at it!
Here's my responses:
1.Obviously my composition would have benefitted from some thumbnails in order to choose a more interesting camera angle and field of vision. Instead, I chose my POV mostly based on mechanics. In fact, I had originally intended to get in the far end of the house, but it was too wonky! How to you accurately predict where your cone of vision will be as you start to set up your grid?
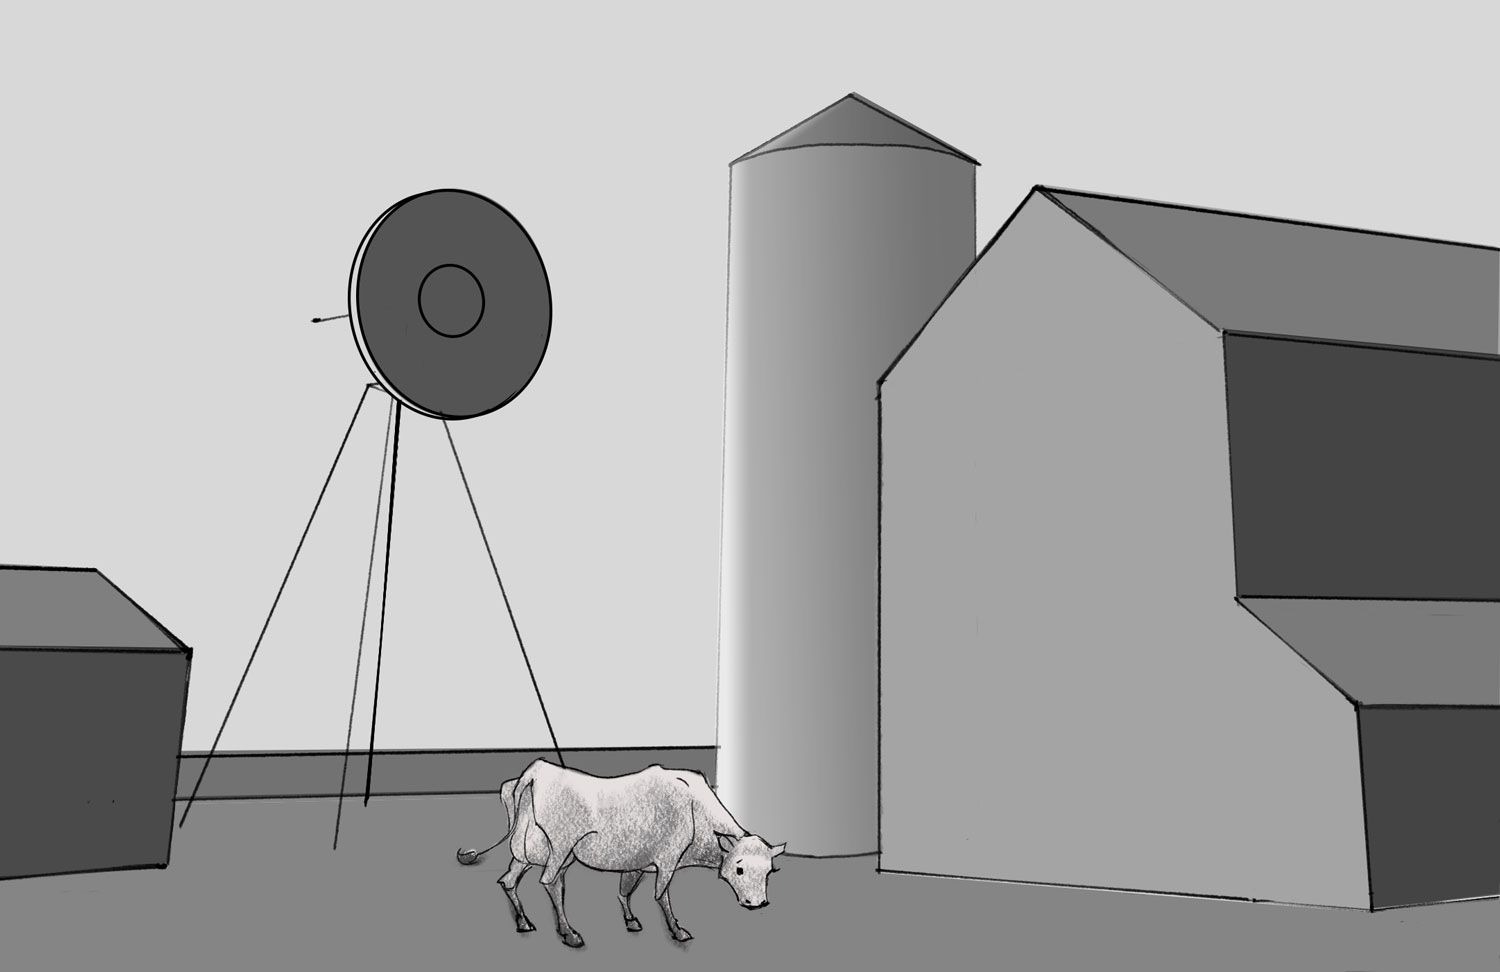
Cone of vision is no more or less complicated than where your POV is directed. For now, just think of it as "what is in front of you". Everything that is in your peripheral vision (the edge of the image) will be affected by the distortion that is inherent to the cone of vision. For this image it's the silo/ windmill that are in the center of COV and will be the least distorted. While the barn and house will be affected more.
As you work on the drawing if you find that the items in the edge of the image are getting skewed fixing that effect is as simple as moving the vanishing points further out. (I find I have to do this all the time)
- Any tips on dealing with unwieldy files on Photoshop? I have a 16" Cintiq and in order to extend the vanishing points out far enough not to warp the perspective, the drawing becomes so tiny that I can no longer see to accurately place the perspective lines. (You can't drag and zoom at the same time--I tried!) I also get lost in all the perspective line layers and in fact, my file may have locked up yesterday because there were over 100 of them! (Today I merged mercilessly.)
Merging mercilessly is my "go to" for big PSD files.
For a three point perspective drawing I will have a "Grid" folder with three layers. One of the LVP, one for the RVP and one for the 3rdVP. Keeping them separate allows for easy "fixes" when you notice a distortion and want to move a VP closer in or further out.As for the drawings itself. I always think of layers like tracing paper. I would never make a perspective drawing with 100 sheets of tracing paper. Instead I'll do my initial work on one sheet (one layer) then put another sheet (layer) on top and fix errors in the layer below. At a certain point the first sheet of tracing paper is redundant and should just be tossed out. I'll do that same thing with the PSD layer.
Keep doing this until you have your "finished" sketch. In the end I'll typically have a PSD drawing of maybe 6 layers.
3.Any tips on drawing an accurate grid on a scene with a low horizon line, or even a worm's eye? I had to raise the horizon line at least a little to have any hope at all of creating the necessary grid along the ground. And even so, I did quite a bit of fudging as I approached the horizon line and the 13th square, because there was so little space between the lines. (And in spite of my efforts, I just noticed that the silo ended up lined up with the barn instead of recessed!) Yesterday's more worm's eye version had the plan in the sky and I was pulling the lines down along the third point. I notice that perspective drawing is much easier to do when the camera angle is very high up.
When you do a worms eye view WITH the ground in the image -- No. There's no way I know of to get a useable grid.
You will run into exactly the problem you described; the lines become too close together to be functional. BUT that's also the advantage -- that is, no one can tell if you did it "right" or not. (keep in mind doing it "right" is entirely subjective. Perspective is only wrong if it "looks wrong". If it "looks right" then -- it's right!)If it sounds like I'm giving you an easy out, just grab a camera, get close to the ground (even better if it's a checkerboard tile floor) and take a photo. You'll see everything on the ground plane lines up on a single ground line. The only way to really tell what is in front of another thing is because of the shape "overlap". You've done that in this drawing with the barn in front of the grain silo. The bottom of the barn and grain silo almost line up on ground, but the barn shape clearly cuts into the grain silo, visually communicating that the barn is in front of the silo.
There is another way to handle a worms eye POV -- Draw the ground plane grid ABOVE the HL and big enough to be functional. In other words, draw the ground as though you were under the ground looking up. Then (because it would be odd in this particular situation to see the bottom of the barn/silo/windmill) simply position the picture plane so that the ground plane grid is cropped out.
I recommend this for 3 point perspective drawings in which the viewer is looking up. It is rare to see the ground plane in a drawing where the 3rd vanishing point is above the HL.
- What do you do if, for example, you draw a room and some objects of furniture, say chairs, are not at right angles to the rest of the objects in the room? I suppose you have to do a separate grid, but how does that work?
You would need to set up a new LVP and RVP (on the original Horizon Line) for each of the objects. This is covered in the Basic Perspective course as the videos start talking about two point perspective. It starts with the video in which I spin an alphabet block. Each time it turns a bit a new LVP and RVP are tracked back to the HL.
Hit me up with more questions. If there are holes or gaps in the class I want to know!
-
@davidhohn Thank you for your swift reply!
Ok, that was what I suspected about the worm's eye, both that you have to fudge and that you basically draw things from below and cut them off. Maybe not the best POV choice for one's first formal 3PP assignment!
Anyway, I did just what you said and got on the floor with my phone camera, although I immediately noticed that what I see through my camera lens is way more distorted into a warped 3PP that what I see with my eyes (which in turn varies according to whether I have one eye closed, and which, but not like the photo). I did see a little bit of floor, but just a sliver.
Good points about the organization of layers, though I still find the sheer size of the paper unwieldy. I can either see the frame or the whole sheet, but not both, which makes it hard to extrude the lines accurately. Also, moving the paper is slow, even on my new computer, which has quite decent specs! But maybe there is nothing for this problem other than to deal with it and make a new, cropped document once I get my grid set up. And maybe, far, far into the future, I could get a bigger Cintiq.
Thanks for the precise indication as to the info about objects with a different perspective. I went back and watched it, and so here is a revised drawing which includes my first cow ever, at a slightly different angle. Again, not the most stylish, storytelling drawing ever, but it was good practice!

-
@lauraa Just goes to show the old adage -- Every drawing is improved with the addition of a cow.
-
Update with a handy perspective tip! And it was so obvious in retrospect
 . As I wrote earlier this year, I hated doing perspective drawings because I was creating these huge sheets to include the vanishing points, and it made my files huge. Just this week it occurred to me that there is a much simpler solution for those of you who use PS:
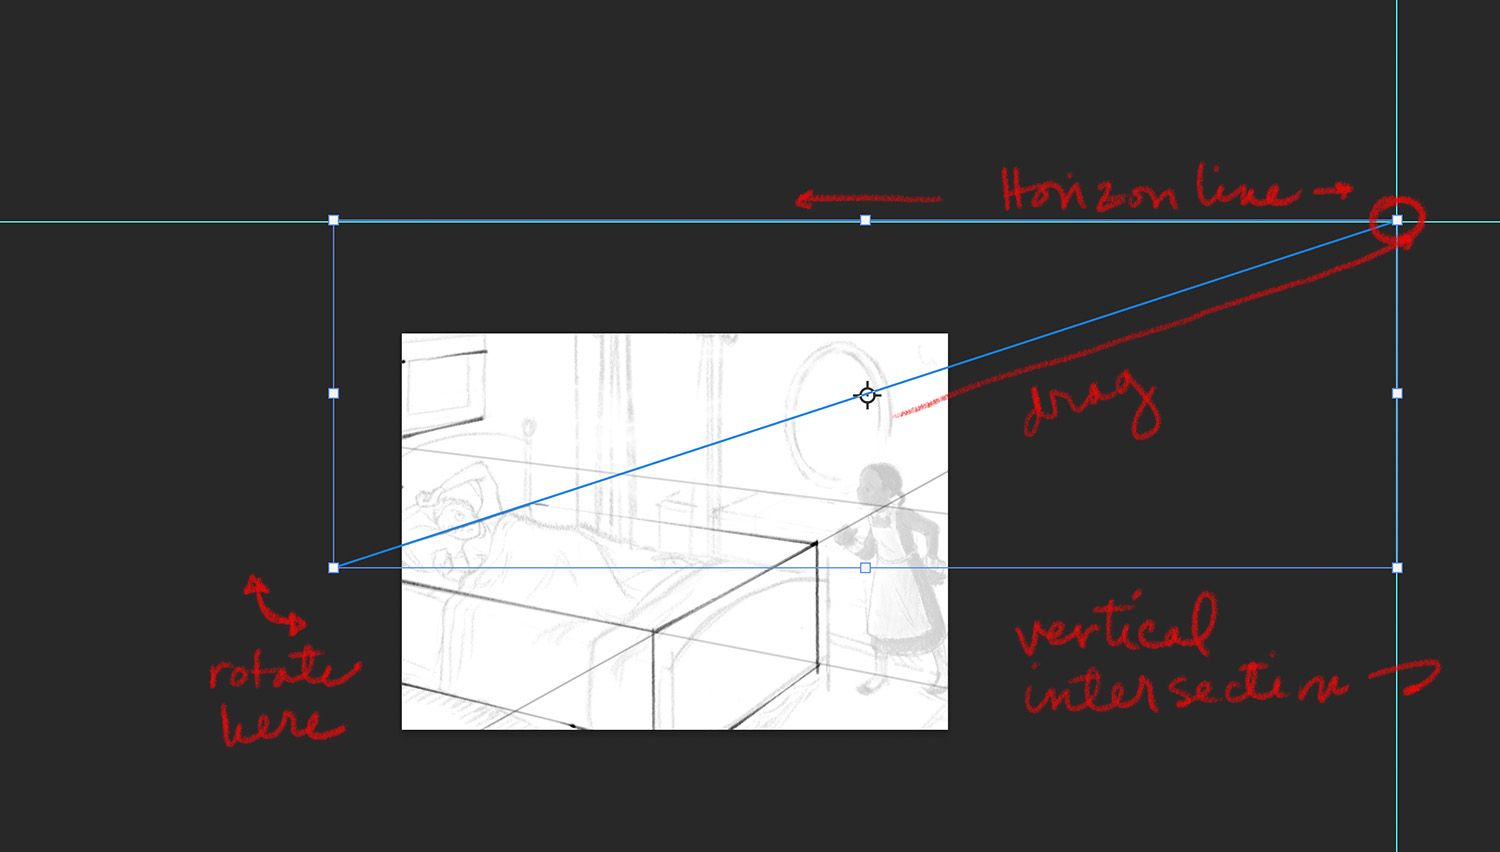
You know those (usually blue-green) guidelines in the PS docs? And you know how when you transform a shape, there's a little dot in the center that the transformation rotates around? Basically, that's the solution.
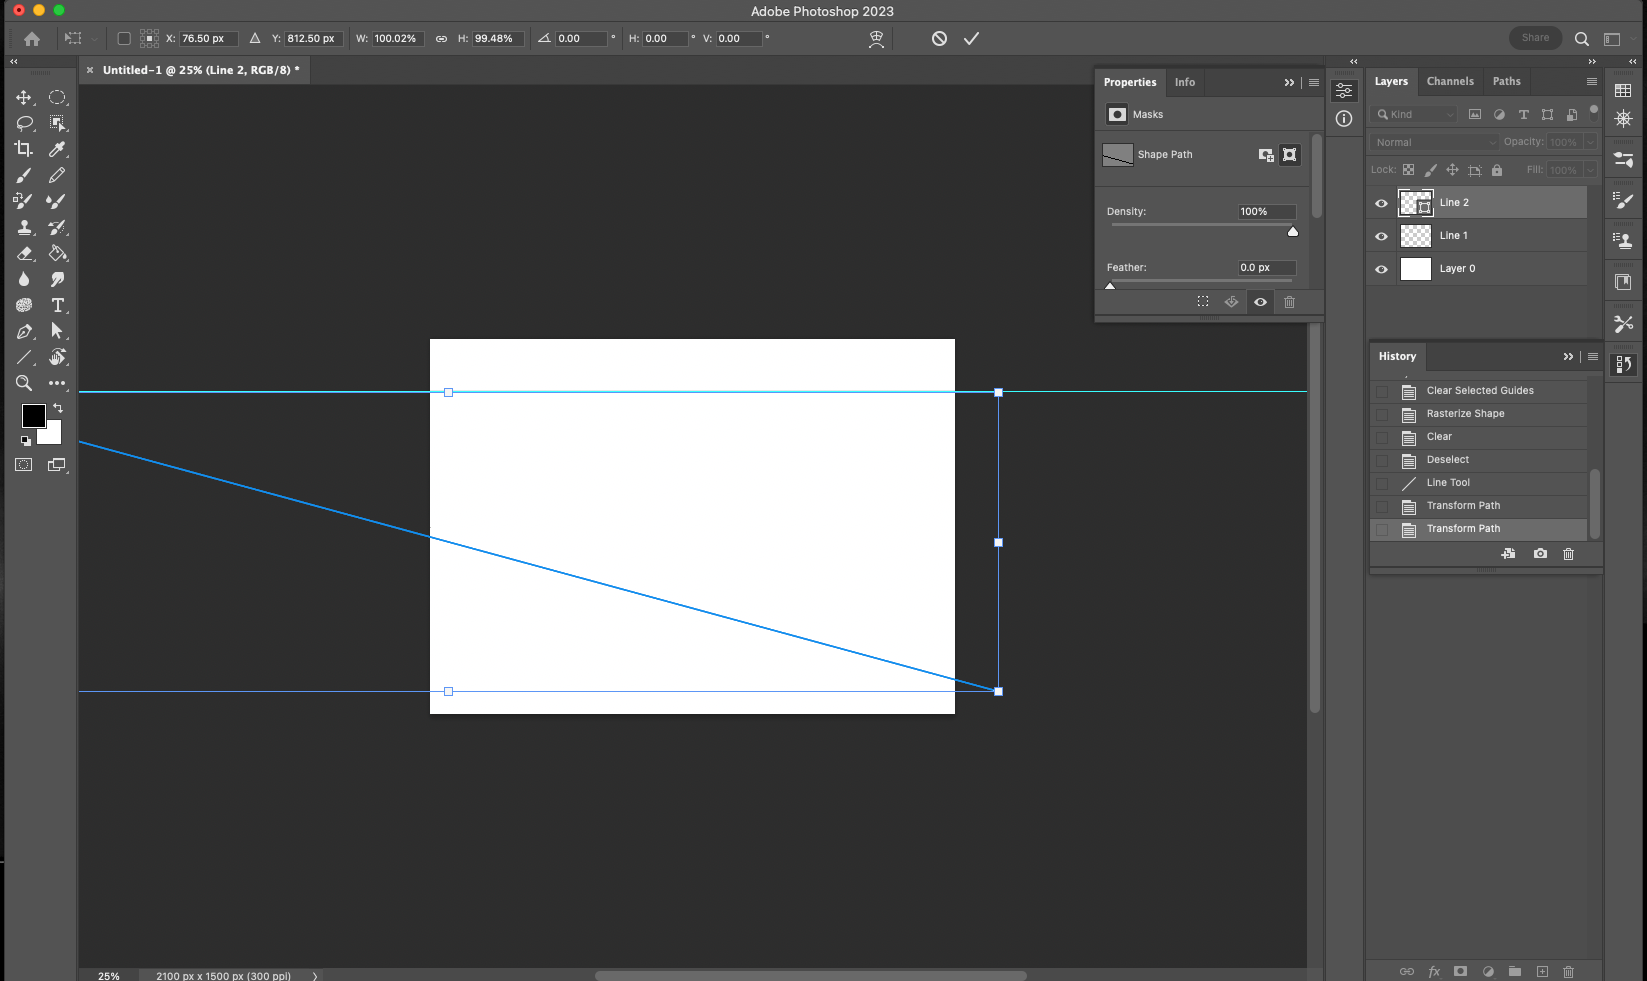
You create a horizon line with a horizontal guideline. Then you draw out a perspective line from the horizon line with the line shape tool. Drag a vertical guideline to where this line intersects the horizon line, which becomes the vanishing point. (Or a vanishing point, because you almost always at least one more.) Then you hit cmd +T (on a Mac) to transform the line, drag the center point in the transform box to the vanishing point, and then you can rotate your perspective line to any point you need in the composition to draw out your perspective. Of course you do have to keep dragging the center point to the corner every time you need to move the line, but that's a walk in the park compared to dealing with a huge file. You can work at your original doc size and it's just a line layer or two, so it doesn't weigh down your file!
And since a picture is worth a paragraph of words, here's one I'm working on now, taking a sketch to finished drawing:

@LauraA said in Advanced perspective--I spent HOW long on this?:
Any tips on dealing with unwieldy files on Photoshop? I have a 16" Cintiq and in order to extend the vanishing points out far enough not to warp the perspective, the drawing becomes so tiny that I can no longer see to accurately place the perspective lines. (You can't drag and zoom at the same time--I tried!) I also get lost in all the perspective line layers and in fact, my file may have locked up yesterday because there were over 100 of them! (Today I merged mercilessly.)
-
Hey there! Thanks for posting this tip! I am having the same problem with giant files and want to try your method. But when I click cmd T after using the line tool, it gives me a box around it, but no center point that I can drag over to use as an anchor. Do you have any idea what I'm doing wrong?

-
@GabeRobinson Yes, and it's easy to fix! See that little unchecked box above your file name, Untitled? Check it, and voilà! Your center point will come back. It's handy to uncheck it sometimes when your transformation box is very small, but usually you'll want it checked.
-
@LauraA Thank you so much!!
-
@LauraA Here is another easy way to get a perspective grid in Photoshop using the Polygon tool - very fast once you know how! And you only need two shapes to build a whole grid.
-
@StudioHannah Sorry it’s a bitly link, the forum wouldn’t let me post the whole link because it thought it was spam
 It’s a tutorial page from tutsplus(dot)com
 -
@StudioHannah Thanks! I'll have a look.