Feb 6, 2020, 5:20 PM
@theprairiefox Every. single. time.
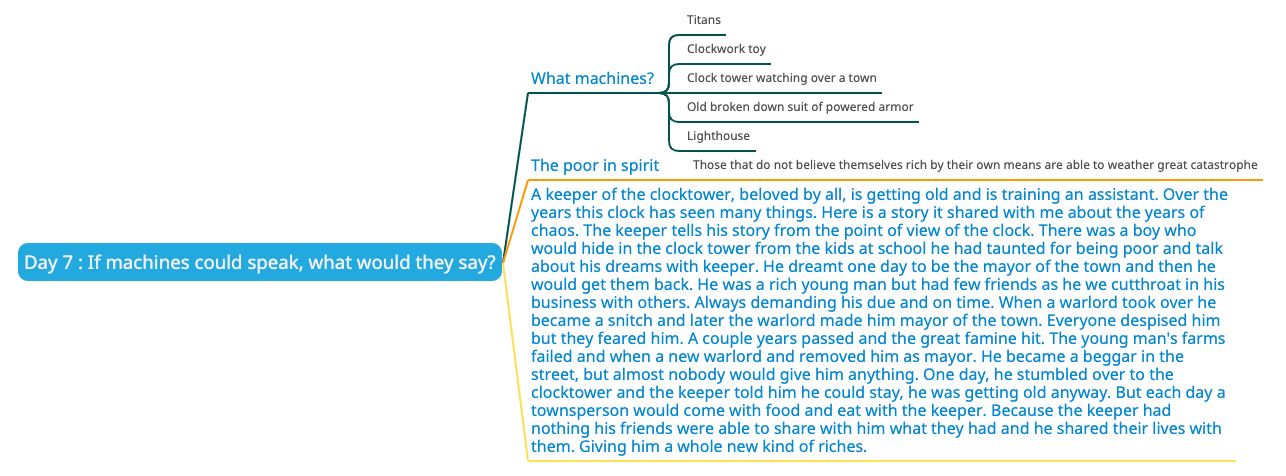
Honestly, adding value to my rough sketches is probably my favorite part of the book. As that's where the real storytelling begins.
@xin-li Here is my process (so far) I am working through it with 2 dummies right now and that is informing the process as I go. The end of the process has not been tested as I am not that far yet with either of the dummies. I will try to provide reasoning as to why do things as well.
8x10 Picture Book Dummy Template
If the text depends heavily on the illustrations I will include illustration descriptions. One of my dummies has only 300 words or so of dialogue and some pages have 0 words on them as the main narrative is shown in the illustrations. This is an advantage the author/illustrator has that is more difficult with a separate author and illustrator.
Have readers/editors review the text in dummy format. I chose the google slide format as it allows me to have remote editors/readers review and provide feedback right in the tool. Not only this it feels very much like a physical book to me. I might be an editor at heart (ask @Braden-Hallett ) and this allows for tons of editing and feedback.
At this point, I will develop a counter-narrative or additional narrative that exists only in the illustrations. I will document this somewhere so that I create illustrations I can refer back to it. Think of stuff like a cat in each picture that is not really part of the written narrative. Or a counter-narrative of an unspecified creature reversing everything the main character does. Every book doesn't need this, but it provides non-readers a jewel they can find that the reader may miss.
Once I am satisfied with the text, page turns, rhythm, and flow I will begin the illustration process. First I start with character and style studies. I will attach these examples directly into new slides at the end of the dummy so all my information is in the same place.
Next, I will do 2 two page spreads. I do this intentionally before I sketch the whole book out. I do this because of comments @Lee-White has made about the illustration process and that the first 1-2 finished spreads usually cause the editor or illustrator to go back and do deep revisions of the other sketches. You might decide on specific style changes or to change or add an illustration narrative. I have found this to be true based on my style of working, though I can't attest to it globally.
This is how far I am with my most advanced dummy. So, the rest of the process is speculation at this point. But here is my plan:
I will now sketch out the entire book. Some things I will look for at this juncture are illustration pacing, double spreads vs. vinettes vs. single page, review illustration narrative is complete, and style consistency.
At this point, I will have a larger group of editors/readers review and provide feedback. Note that with google slides I can have feedback directly give in the tool or I can also simply PDF the document and solicit feedback through email.
Once satisfied I can create a PDF to start submitting to publishers. Here, I will need to do a few different things like preparing a cover letter, create a book synopsis, and move the text back into a true manuscript format. I am not sure what else as I haven't gotten this far yet.
I plan on also creating a physical dummy using www.blurb.com by choosing 8x10 as my size it should be relatively easy and cheap (<$10) to create these and I will be able to show them to any audience I meet in person. If you choose a different size the cost will increase as they are not the 'trade' size but still pretty reasonable.
@xin-li thanks for posting this. As you can see I LOVE building a process I can follow multiple times so I don't have to think about it again (and can focus on the creative work). This forced me to write it down and now I will be able to use it going forward!
-The Prairie Fox
https://www.instagram.com/theprairiefox
https://www.theprairiefox.com
@Coley i guess both. I am doing it to pitch a picturebook story :-), It is also good practice.
@theprairiefox wow. I will have to take some time looking through your process. Fascinating. Will come back with more questions and thoughts ")
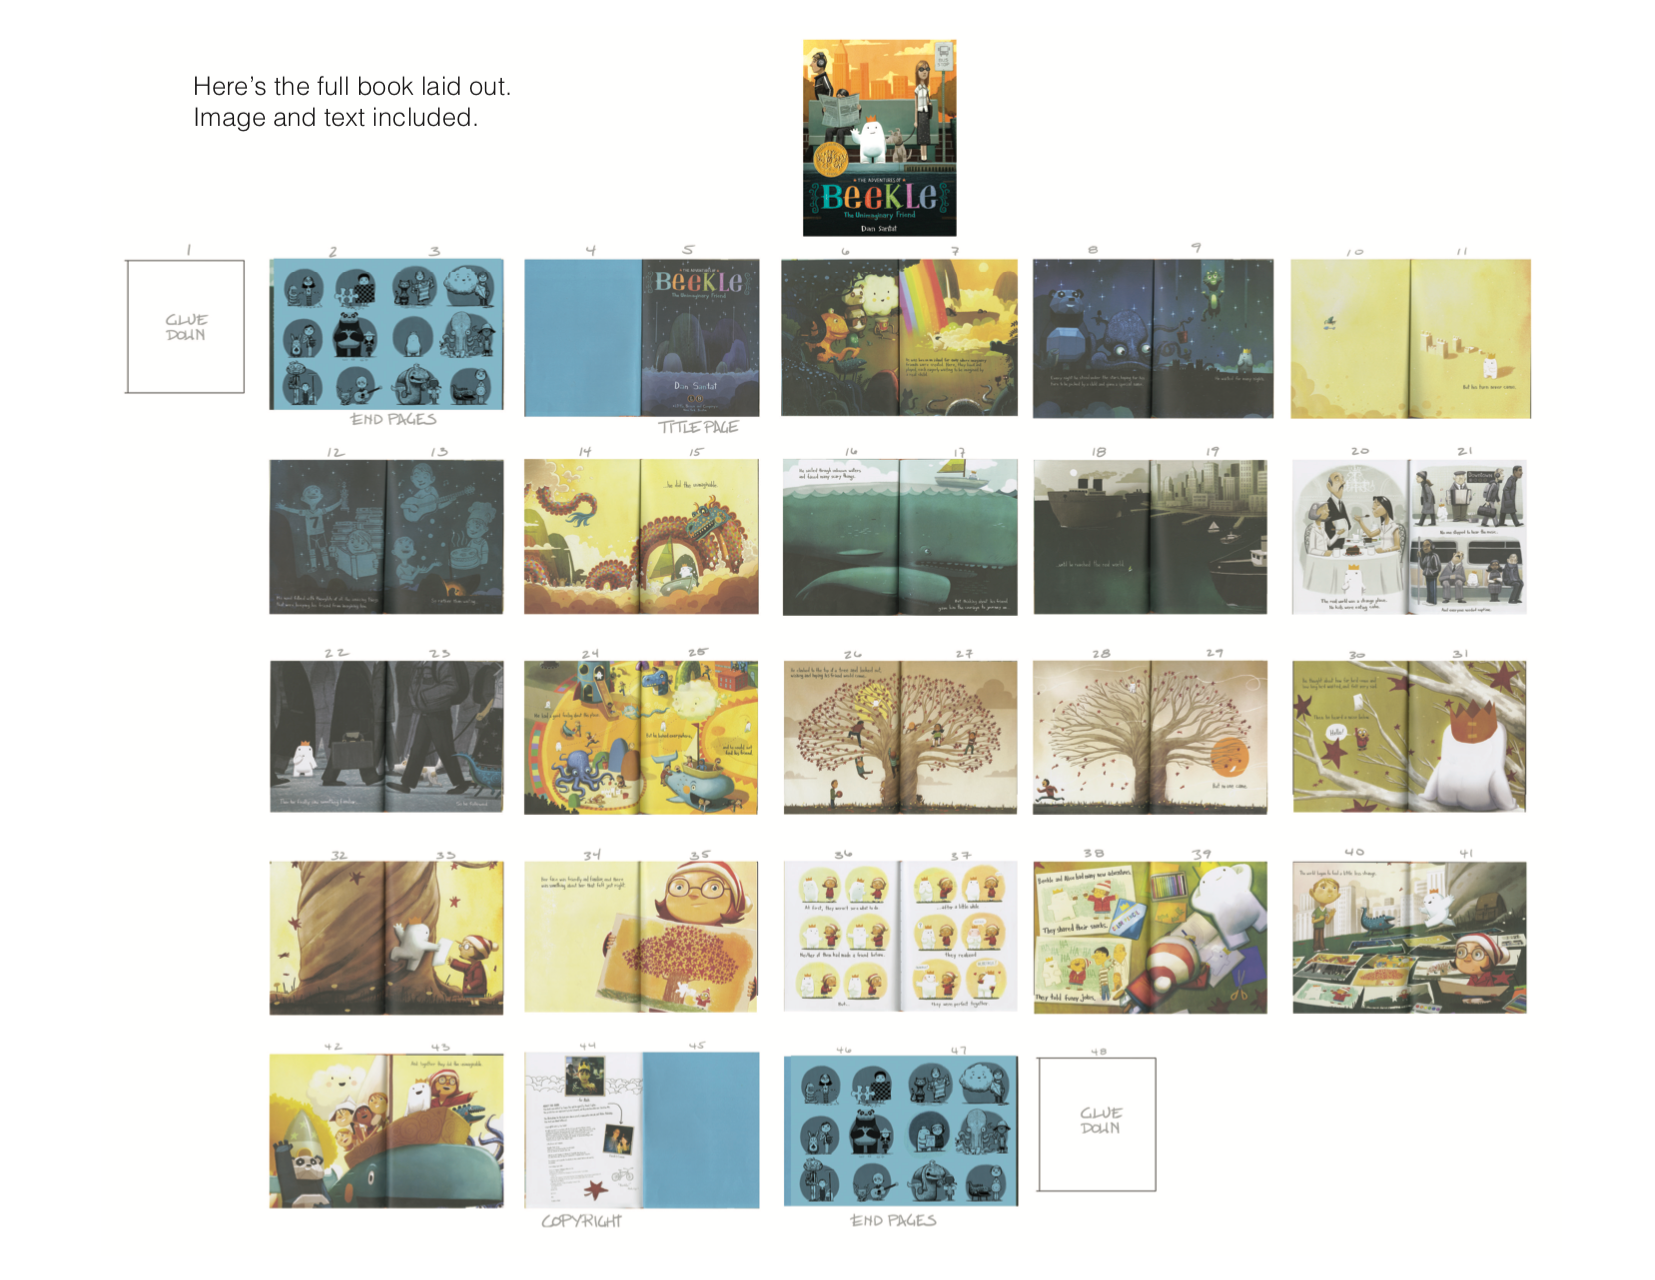
@Laurel-Aylesworth There are no rules to laying out a dummy. Every book is going to be different. I'm a fan of taking various books that are either similar in subject matter or that "feel" similar to the book I'm dummying up. Photographing each page and laying it out as thumbnails. Then looking to see what choices the illustrator made. I find it's easier to see patterns in pacing, compositional choices, color scripting etc.
For example in Dan Santat's BEEKLE it's clear the choice to deviate from full bleed spreads is a choice rarely and carefully made. Everything is full bleed spreads except two where he uses vignettes to both speed up (pg 21-21) and slow down (pg 36-37) the action.
The first time I read it, I found the tree spreads on pgs 26-27 and 28-29 to be oddly flat and out of place with the other illustrations in the book. It wasn't until I laid this out that I realized Dan was trying to mimic/foreshadow Alice's drawing of the same tree on pg 35.
Also the desaturated/monochromatic quality of the images starting on pg 18 and continuing through pg 23 becomes more obvious.
I'll also often go through and try to simplify the images into simple black, white and grey shapes so see how value and silhouette affect the experience of the book.
When I did that to BEEKLE I realized that the little white shape of Beekle always appears on the right page of the spread -- except for pg 18-19, 22-23, 26-27 and 28-29. These are the moments in the book where Beekle is feeling unsure or overwhelmed.
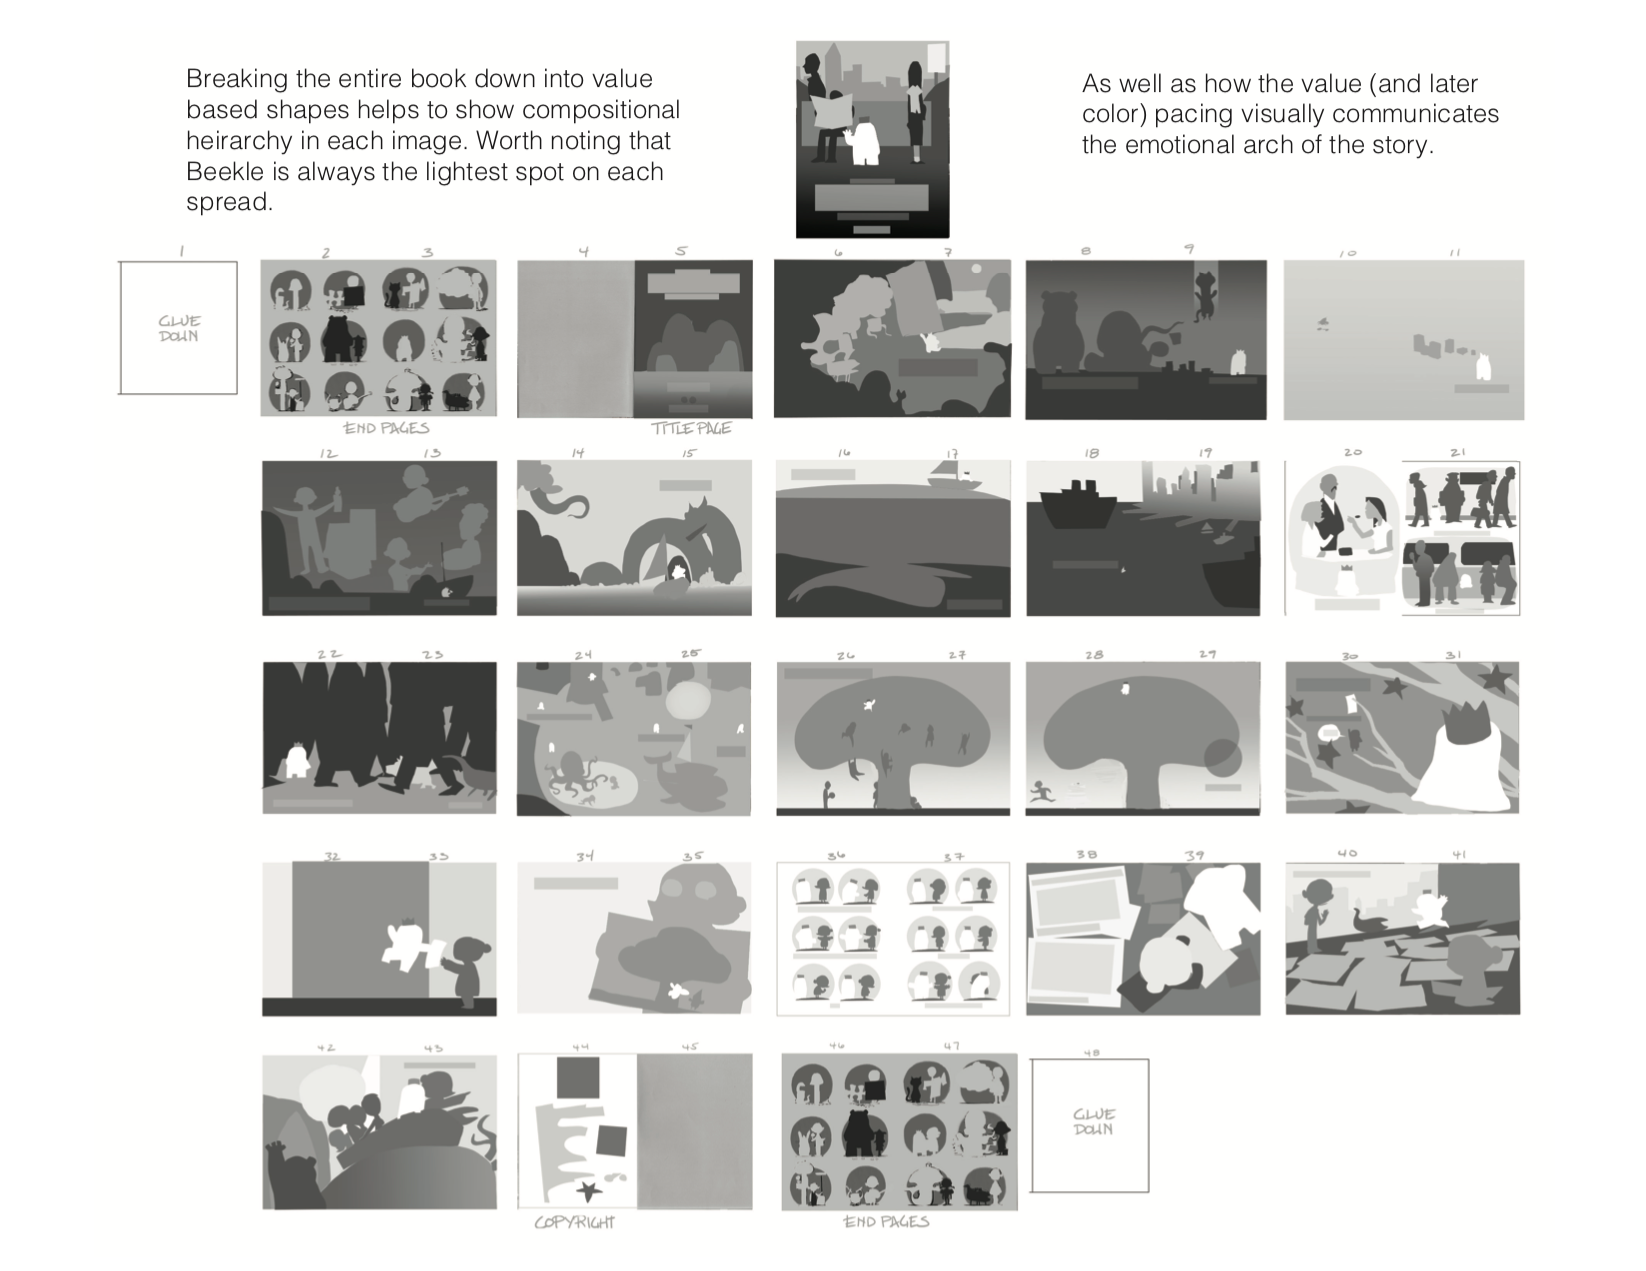
These are some of the highlights from this particular book breakdown. Do this to a few other books and you'll start to see how other illustrators approach laying out books.
@xin-li one thing I forgot to mention in step 8 is to take into account your page bleed. Because my process is physical it is extremely important to make sure your illustration has the extra .5in of height and width to fit the bleed.
@davidhohn very cool process. Love this for the pacing. Do you add value to your sketches before sending to an editor? So much is lost without value...
-The Prairie Fox
https://www.instagram.com/theprairiefox
https://www.theprairiefox.com
@theprairiefox Every. single. time.
Honestly, adding value to my rough sketches is probably my favorite part of the book. As that's where the real storytelling begins.
@davidhohn I figured. I love working in value. It adds so much life to the sketches. I am so happy that you and @Lee-White introduced us to that process in "Turbocharging your creativity". It really changed how I approach my design.
-The Prairie Fox
https://www.instagram.com/theprairiefox
https://www.theprairiefox.com
@theprairiefox Thrilled to hear it! I still remember learning it from illustrator Mark English. Pretty much blew my mind!
@davidhohn thank you so much for sharing how you study/analyze picture books. I am going to do this process with every picture book I love.
I'm working on a dummy book too! They are a lot of work! lol. Here's how I'm doing it, (I don't think there is really a right or wrong way.)
Heres my thoughts on it...I don't know how I would have done this without a finished manuscript...I felt like figuring out the pace of the story was the hardest part and without a complete story I would be lost. Also, I ended up not liking the way I drew my characters so my final paintings are unusable as is most of my spreads because I'm drawing them different now. Problem is I've been working on this book for 8 years and I'm getting a little bored of it so who knows how long it will take me to finish!
Yours is looking great so far! I hope you do share more as you continue.
@xin-li Happy to share! I see that you are already setting your book up in this kind of storyboard format.
What I try to do these days is be very clear what the intention of each spread is. What is happening at this point in the story? And how do I want the viewer to feel as they make the page turn and experience the spread? I try to boil it down to one or two "keywords". These keywords go a long way toward suggesting composition, camera placement, character pose, value structure and color choices.
And I've found it's MUCH easier to dissect other illustrator's work first. Then apply that way of thinking to my own books.
I hope you give it a try with your favorite books. But don't overlook the value of doing this to books you hate. Especially if they are super popular. It may well give you an insight into why that "terrible" book is doing so well!
@davidhohn Thank you so much for this break down of the process. Really helps!
@theprairiefox thanks for the write-up and sharing your process.
Regarding to no.5
I found it very interesting that you review the text-only version with readers/editors. I am wondering if it matters with the type of stories? The story I am working on right now is very much depending on the illustrations to carry out the drama of the story. The size and placement of the characters and objects are essential for the story (it is hard to put these things in words, I think I have to thumbnail it out to make sense). I was thinking of waiting until I am in the rough sketch phase to have a reader/editor review.
I always wondered the wordless picture book "Sidewalk flowers" illustrated by Sydney Smith, and written by JonArno Lawson, what was the manuscript looked like? and how much did the author and illustrator collaborated in the process?
Regarding to no.6
I love an add-on character, especially for younger children, they are wonderful to make book reading fun, slow-down.
Regarding to no.8
Thanks for reminding me this. I also remember hearing Lee saying that at one of his lectures.
Regarding to no.10
Do you have a critique group? I found it hard to get feedback from editors in the process. My office is in a creative collective, and I can ask co-workers from the collective to take a look of my dummy - some of them work with illustration, but the majority of people work in either game or advertising.
I subscribed Storyteller Academy this month to go through a book dummy course with Arree Chung
One thing that made a lot of sense to me is what he called "to have the end product in mind from the beginning". He encourages students to make the physical dummies the same size as the final book, to get the feel of the final product even in the early sketching stage. I will be doing this in my process. I thumbnail with pen and paper but do rough sketch digitally. So I will be printing out all rough sketches in real size, and glue them together to make my first real size dummy.
@KaraDaniel Thank you for sharing your process.
I know that Will talked about their process always starts with a finished manuscript (in that SVS class with little red riding hood). But I find it counter-intuitive since illustration is telling half of the story, it is hard to leave it out in the beginning. I always have a hard time understanding how a picture book is done without author and illustrator working closely. I guess the only way for me to get it is to work on a picture book that is written by someone else. :-).
@davidhohn thank you for the study tip :-). I need to visit the library to dig up a couple of terrible and popular books :smiling_face_with_open_mouth_closed_eyes:. I have never thought of study them in such a way.
I will always remember your lecture on emotional keywords. That was one of the best things I learned in 2019
@xin-li oh I definitely think a lot of writer/illustrators work on their manuscripts and illustration simultaneously and that works for a lot of people. I just like to have all my words first then use the pictures to enhance the story. (And I am in NO way a pro so I could be totally doing it wrong! Lol) Some books are only pictures, or just very few words. It depends on the book I guess. Seems like the way you are going about it so far is working out great.
Hi @xin-li, this is a great question. I'm also interesting in seeing other's work process.
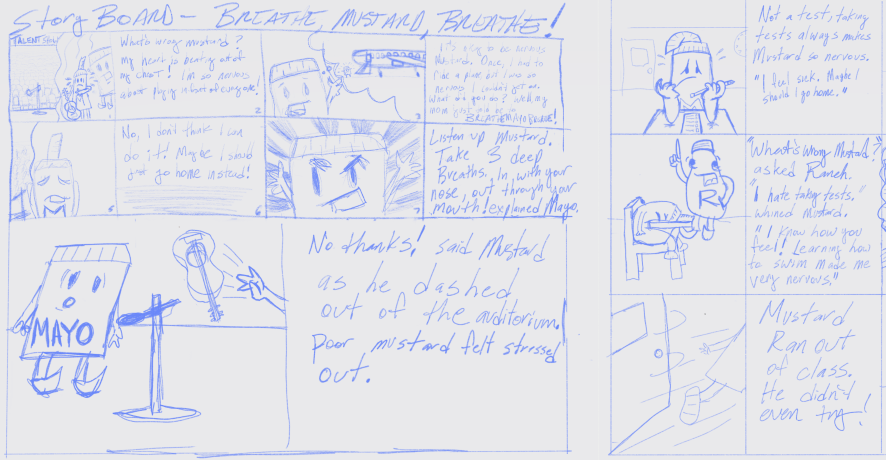
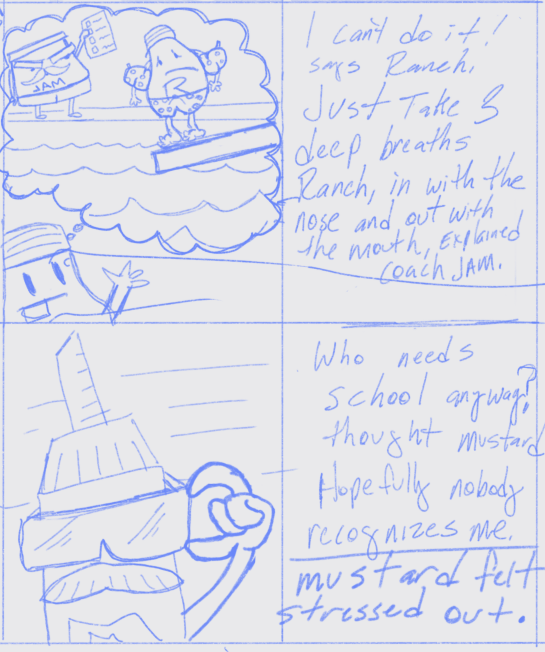
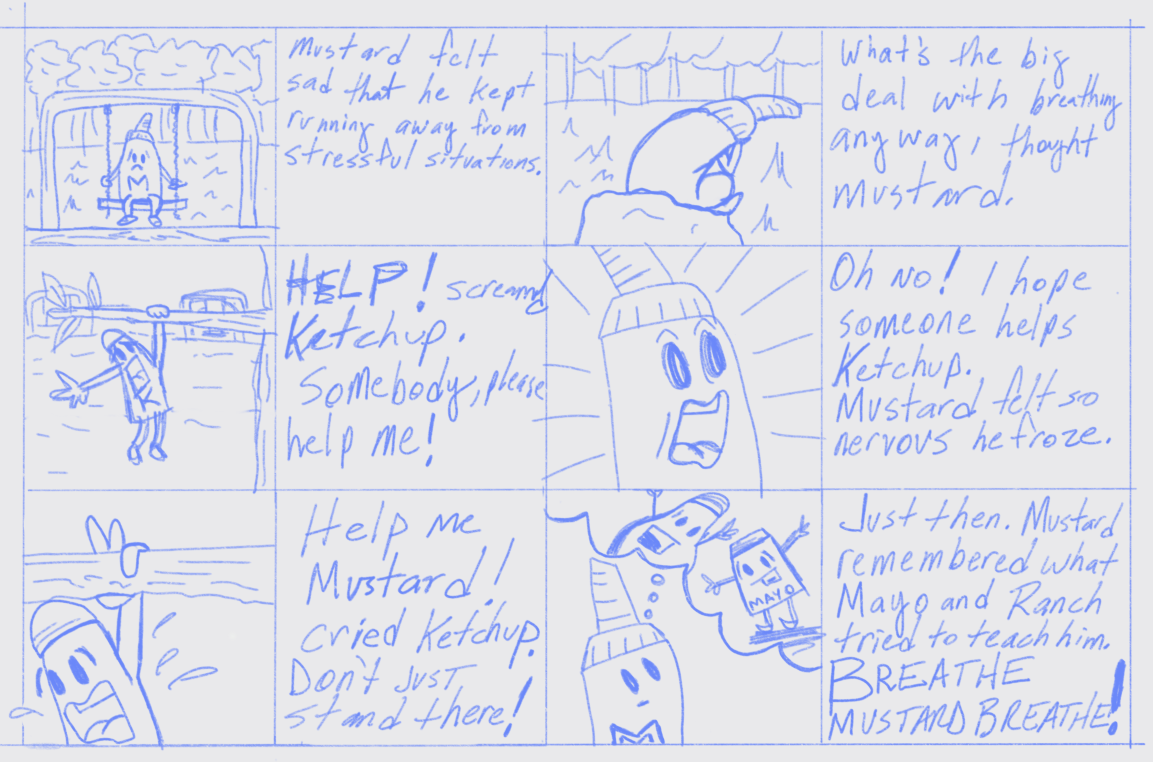
Here's an example of my process, followed by printing and stapling 8.5x11 sheets together to simulate the physical book. These were very loose and fun sketches, but gave me the freedom to build up the tempo.
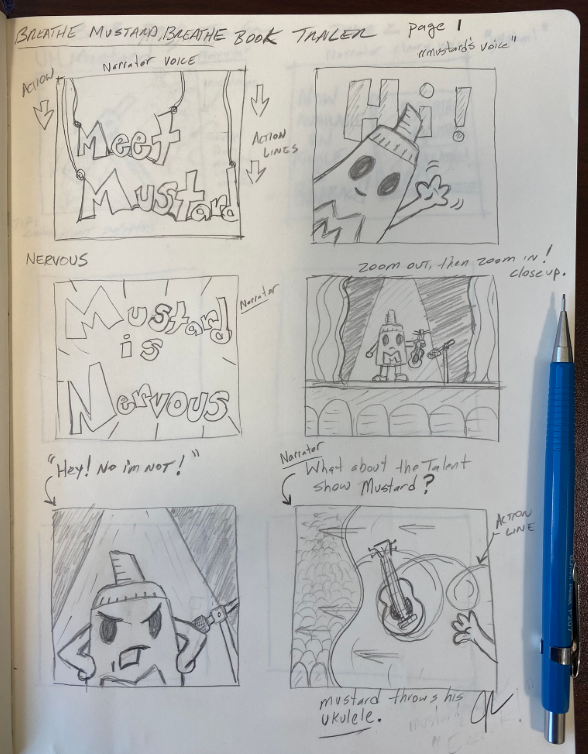
Oh yeah, before I forget - I also did the same thing with my book trailer (but in traditional pencil) - which I animated and created the music track. This is also shown below. I can send you a link to the trailer if you're interested in seeing how it came out.
Thanks!
Thanks @davidhohn! I love Beekle and pretty much all of Dan's work! So much so that I tried my hand at making the book cover of Dude in my copy covers for practice forum post.
Thanks for sharing the process, very helpful!
Jeremy
@davidhohn Very nice to see this example!!! Thanks for posting...I think the value study shapes are a great way to go...
@theprairiefox Every. single. time.
Honestly, adding value to my rough sketches is probably my favorite part of the book. As that's where the real storytelling begins.