iPad users: how do you handle reference images?
-
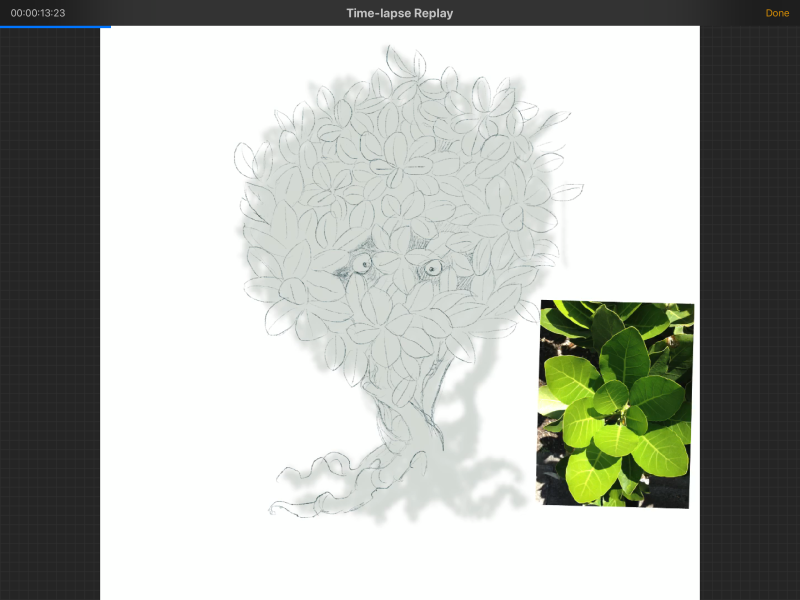
I do the majority of my work on an iPad pro, but one thing I wanted to hear from other people is, how do you set up your canvas if you have reference images to work from? Do you use the split view mode? Do you make a big canvas and paste your references on top?
Please give me an idea of your workflow for reference photos/comps. Screenshots are particularly appreciated!
-
This is a great question. Looking for others to answer as well.
For me, majority of time I just use split screen. But there's not a lot of screen real estate to work with. So I don't use it often. Bringing an image in the canvas could work but I haven't had the need to do that yet. It would be nice to have a section on the bottom right where we can insert reference images. (talking about Procreate specifically)
Hopefully the guys at Procreate do something for that. Also, Adobe should have a version of Photoshop for iPad out soon so they might also have a solution for that as well.
-
I always work on a canvas larger than my final painting is going to be but then create a background layer of a different color that is the actual size of the picture so that I can draw objects beyond what will be the final cropped area (as recommended by Will Terry in one of the SVS videos.) This also gives me a margin area to create a color palette or write notes, and to hold general reference photos. I import them, resize them, and arrange them on that margin in their own layer or if I have a lot, I may have two or more reference layers that I turn on and off.
When I'm using a using one photo extensively, I put that on it's own layer so that I can enlarge it and drag it next to the section I'm working on.
I tried using the split screen but this has worked better for me. I do have to remember to lock those reference layers when I'm not dragging them around -- I can't tell you how many times I forgot to go back to my drawing layer and ended up painting on the reference photo layer.
-
I put the reference on the canvas, in their own layers. I don’t make the canvas bigger - I just move the references out of the way or hide them when they get in the way.
I guess I should really upload some of the screen-capture videos!
-
My process is pretty simple. I just add the image into my existing canvas. I don’t really use a huge canvas with a lot of space. I just use a small one and whenever i need to paint that part where the reference image is, i just hide it.
-
@smceccarelli @zoepiel this is what I do also.
-
@demotlj Your method sounds close to mine (putting the reference images on their own layer, then turning that on/off, or moving the image around on that layer) but the idea you quote from Will Terry ups the game even more. I've been drawing in "thumbnails" for my inktober work and that allows me to draw off the margin and that's been helpful. I'll try the use of margins in a full page drawing. Thanks for passing along Will's tip.
-
I split the screen between my webrowser/pinterest and procreate, and then I can look at a bunch of reference photos.
-
I typically use split screen or use my computer screen as reference if I’m sitting at my desk, the only time I bring a reference pic to the Canvas is to create a color palette.