Getting Started
-
I've become a fan of Will Terry's YouTube channel and the great advice and insight he provides. I've purchased several of his SVS courses in an effort to improve my work, but I've still got a long way to go. I'm a cartoonist and decided to use my character to experiment with some of the techniques I've learned here, but I can't seem to make the line of the mouth look more realistic in terms of shade and light, and the outer outlines of my character are awkward. At any rate, I'm really glad I've found these courses and look forward to learning lots more.  image url)
 -
Hi @abbottcartoons, and welcome to the forum! I've been following you since the old cartoonist forum run by Leah and Simon. Oh, and I also follow you on FB
") Anyway, maybe the issue is where the shadow falls on the lip. In the clip below (Howard McWilliam is the illustrator) it looks like the shadow is more on the top lip,and a highlight along the bottom lip. Take this with a grain of salt as I've still got more than a ton to learn, but it's a thought to try and see if it helps.
Anyway, maybe the issue is where the shadow falls on the lip. In the clip below (Howard McWilliam is the illustrator) it looks like the shadow is more on the top lip,and a highlight along the bottom lip. Take this with a grain of salt as I've still got more than a ton to learn, but it's a thought to try and see if it helps.
-Kat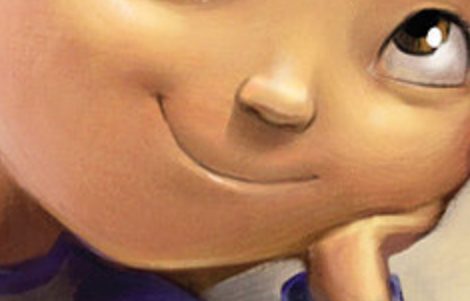
-
@Kat - That's a great example - thank you for that!
-
@abbottcartoons I agree with @Kat . Normally the bottom lip would be in shadow of the upper lip. But since you have a protruding underlip, the top part of the lip should have more light and the shadow would fall on the toplip. Great example @kat.
-
As well as the great points raised about the lips above, I think overall you could improve this by thinking more about the position of your light source.
-
@Jim-Algar You make a good point - I'm looking at material now to help me better understand the effect of light and shadow.
-
@abbottcartoons Not sure what program you are using but to paint in the occlusion (Darkest part of image where no light gets in) Use a multiply layer on top of the image. Use a hard edged brush. Pick a very dark red color almost black. Now paint along the edge of the crack the hard edged brush will give a nice crisp line right where the crack is. Now take a soft eraser at a low opacity. Start at the outside edge and erase back towards the crack until just a sliver of the original stroke is left right at the crack. The soft edged eraser will leave a small bit of the original dark stroke behind making a soft gradient up to the hard edge.
If the black is a little too dark lower the opacity of the layer until it looks right. Hope this will help a little.
Here's a link to the guy I learned this from and the process in practice :http://theartcenter.blogspot.com/2010/03/sam-nielson-painting-process.html -
Cool! glad to have you here! Your drawing of Popeye made me laugh out loud! very funny.
I'm not very familiar with digital painting but good luck finding the solution to your rendering questions.
Cheers,
Anderson Carmanhttps://www.andersoncarman.com/
https://www.instagram.com/andersoncarman/ -
@evilrobot I use Clip Studio Paint Pro which has been great for all my cartoon work. I have an older version of Photoshop 7, but Clip Studio just seems to be more comfortable for me. I'll check out those links - appreciate it. I spent all my adult life in the military, so I've got a whole lot to learn in creating art. This seems like an excellent place to make improvements.
-
@andersoncarman Thank you Andrew - much appreciated!