Photographing Your Art (Tutorial)
-
I'm a Photographer so I prefer to photograph than to scan my art. Also, the texture of the paper is best represented and conserved with a good soft light (I think). I made a Little tutorial just in case could be helpful to someone.
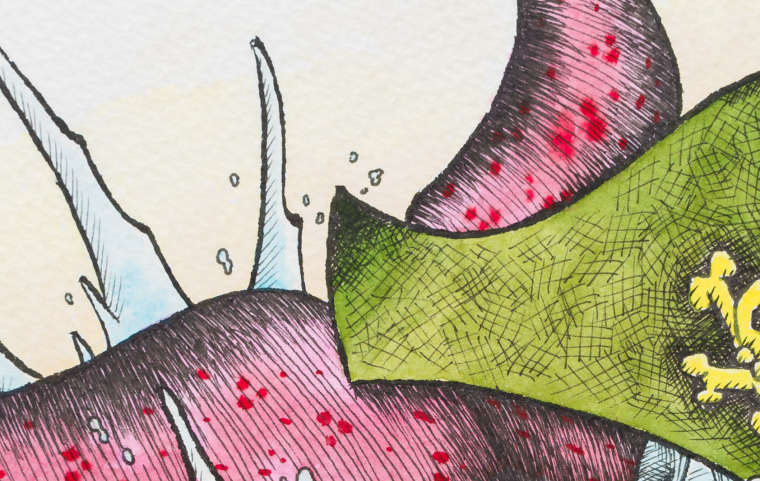
This is a crop 1/1 of the result photography

Or you can see the crop uncompress here: https://drive.google.com/open?id=1dFXeiBC9pyo3qCH6p9r68KSHdbw9c6Ds
I believed that it can't be achieved that soft detail, like the texture of the paper with a scan, but correct me if I'm wrongAnd the tutorial here:
https://jazzstepscat.wixsite.com/website-5/single-post/2018/08/09/Photographing-Your-Art-Tutorial
I hope can be helpful for someone. Ask me any question.
Thanks! -
@zombie-rhythm THANK you so much! I have been getting a bunch of work ready for an art show coming up, but really want to have good photos so I can still make prints of the ones I sell. I've been wondering about this and will check out the tutorial.
-
I see photos....ugly photos on Instagram xD and I am/was guilty of it myself!
These tips really help with improving the presentation of our work as artists. it can mean the difference between getting our thumbnail clicked or skipped.
would really love to know how you keep the place well-lit indoors for better photos. I have a ceiling fan so I can't get any light source in the center of the room tsk tsk.
-
@eli You are welcome!
Soft, well-spread light is key. Before I was using two flashes with large softboxes pointing directly to the art from left and right and is difficult to achieve equal lighting on both sides. I find that one flash pointing to the ceiling in a small room with white walls is very effective and too much easy! Good Luck and let me know! -
That was an awesome tutorial. Haven't used a colorchecker before. I want to try the bounce light method asap!
-
@heidi-ahmad Hi!
Very important that the walls have to be White."How I keep the place well-light indoors" Do you mean when shooting without flash? If you have a naturally bright room, like a room with one or more Windows, you have to choose the hour when the room is brighter, and look for a place where the light is well spread. If you put your art near to the source of light one side is going to be brighter than the other. Look for a place where your art seems equally bright in all the surface. Set the camera on the tripod and since you are not using flash, you have to be sure that the camera doesn't move at all. There are different things you can do depending on your equipment, like setting the shutter with 5 seconds delay, etc.
If you mean that you can not set a flash because of the fan, the flash doesn't have to be in the center. Set the flash so the light bounces on the walls and ceiling, never directly to your art. Make some proofs, check that the photo is lighting equally in all his sides. If you note some side or some corner darker, like vignetting, change positions of the flash or the art and try again. Once you have the "sweet spot" you are ready to go!!!
Good Luck!!!!
-
@tessaw Hi!
The ColorChecker is an important tool for Color accuracy. In Product Photography is indispensable. But is a little bit expensive.Yeah! I was stuck with the two flashes method, with large softboxes, because I learned to do it that way. Is hard to achieve equal lighting on both sides and kills the texture of the paper because the art is bombarded from both sides with light. When I try Indirect light I couldn't believe it. A lot more easy to set, less space, less material, no softboxes (well the walls are now the softboxes) and the results are outstanding.
Thanks for comment and share with us your new photos!!!!
-
This is very interesting. I’ve never had the chance to photograph my work but i’d definitely consider this when i do and when i get my hands on some decent camera. All i have for the moment is a scanner and it does suck sometimes when i scan my sketches and i loose the texture of my shading.
-
@nyrrylcadiz Hi! Thanks for comment!
A "decent camera" today is not so expensive. Micro 4/3 is a relatively new system that is affordable and for this purpose is perfect! Olympus or Panasonic cameras are great. The body is not that important, even the cheapest are great and usually more that enough, like Olympus Omd EM10 that you can buy second hand now practically for nothing.
Now what you have to know is that a body of a camera is so good as the lens you put on it. In most cases, cheap lenses are not crisp, not sharp, as expensive lenses. Kit lenses (we call them that because they are the lenses that came usually in the kit) are enough if you want your photos for social networks, etc, but if you want to print your art I recommend to buy a good lens. Spending less money in the body and more in the lens. -
@zombie-rhythm Thank you so much for the tip! Yeah, I am. Onsidering buying a camera soon. I’ll definitely consider what you said.
-
Oh, pity! This link doesn't work anymore (initial post)! Anybody has got the information saved somewehre or can tell me the basics? Thank you!
-
@Meta I’m glad you bumped this post up. Even just the comments are helpful!
Does anyone else have advice for photographing art? For instance, full spreads for a children’s book?
Thank you!