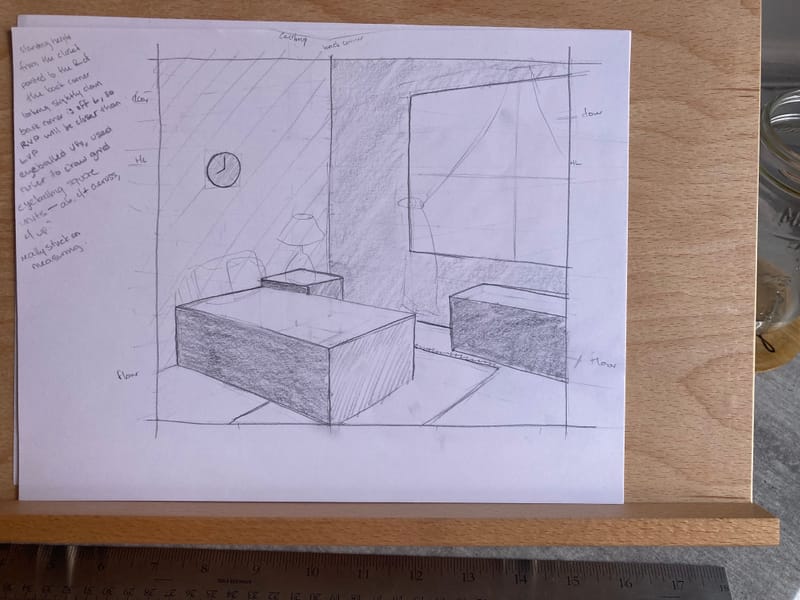
Basic Perspective Final - Critique My Approach
-
I'd love some feedback on my thought process for the Basic Perspective final assignment—I'll write it up below.
I found myself thinking a LOT, especially at the beginning of the drawing, and I'm wondering if my approach makes sense, how to solve that blobby step 3, and if there are ways to simplify the thinking here.
Here's how I approached it.
-
Looking at the overhead plan of the room...
a. I chose an interesting spot for the viewer (right in front of the closet door).
b. I decided where the edges of the image would be by imagining lines going out from the viewer at about 60 degrees. (That got me to just inside the door on the left, and somewhere around 3/4 of the toy chest at the right.) -
Then I went to the paper...
a. I placed the horizon line just above center. (Since I decided the viewer would be standing-height, looking slightly down to get more of the floor/rug, I figured that would work best.)
b. I put the back corner of the room a little left-of-center (based on the POV I chose above in 1b), so I drew a vertical line there.
c. Based on that, I eyeballed where vanishing points would be (off the page), figuring that the RVP would be closer since we're seeing less of the left wall (converging to the right). I used a ruler to draw a grid based on eyeballed VPs. -
Here's where I really got in my head...
- How do I figure out how tall or wide anything is? How far from the HL to the floor? I tried to figure out how many units across it was from one edge to the other (based on those points from 1b), but that was tough because it was on a diagonal ... plus I was thinking "Am I overthinking this? This is beginner perspective, after all..."
- I ended up putting tick-marks at the edges of the canvas, then trying to measure back to the back corner ... but TBH I think I messed up in the logic and just ended up fudging it.
- Once I was able to establish a square on the floor in the back corner, things got easier from there. I could repeat squares using the bisection method, and eventually just use perspective lines to place everything else. Each line made the next line easier.
Sorry for the windy post. I hope that makes some kind of sense, and if you have any thoughts or suggestions, I'd love to hear. And if you read this far, thanks!
And here's the final drawing. I did most of this freehand/by eye, and my focus was mostly on establishing the right FOV and getting the major box shapes roughly in the right scale and proportion. (I want to challenge my freehand skills, but I'm sure that leaves the drawing a little lumpy as a result.)

-
-
@Ryan-C I think you did a great job. Deciding on size, is not really a need for exact, but more what looks right. Does it look right for a nightstand? If it does, then it is. The only thing i can see that i would add, would be thickness to the walls. This would be done by adding depth to the window with a sill. Good work!
-
@AngelinaKizz Thanks! That's helpful advice, to practice judging what looks right—I appreciate it! (And it ties in with one of my favorite things about David's class: how he encouraged us to develop an eye and an intuitive sense for what a square looks like in perspective, and to practice by observing, guessing, and correcting.)